Pages

Saturday 29 April 2017

Dreams do come true

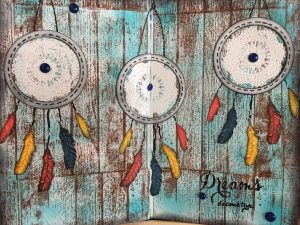
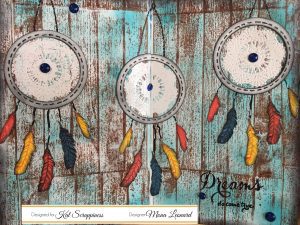
Hi everyone, this is Mona with another fun journal page. Hope you enjoy this mini tutorial featuring this  Dream catcher stamp set by Mudra and most of my supplies from my favourite store Kat Scrappiness.
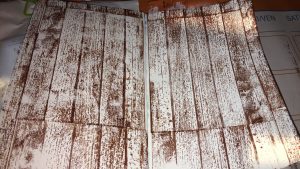
I first started by using my Dylusions art journal that can be purchased at Kat Scrappiness and adding gesso to both pages. After it was dry I used my brown Archival ink amd my wood plank background stamp and added it all over both pages carefully aligning it to keep the planks ligned up.
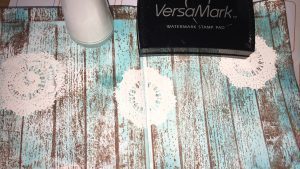
Once my brown was dry I used my blue lagoon distress  Blue lagoon distress ink along with my mini distress tool from Ranger to add a bit of colour to my background.
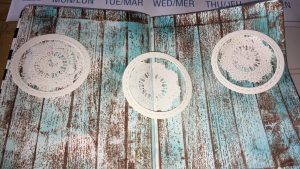
Now that my background is all done I used the middle part of my dream catcher and stamped it with Versa Mark, then added  Wow White embossing powder  and heat embossed it to make it really nice and bright. I embossed three of them to fill up my page.
I then took two circles from Gina Marie stitched circle dies and lined them up so I could make a ring. I die cut three of the rings and glued them around the embossed inner part of the dream catcher using Nuevo adhesive pen.
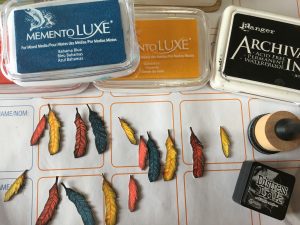
Now for the fun part I stamped a bunch of feathers from  Dream catcher stamp set by Mudra  using different ink colours to make them nice and bright each leaf are two step stamps so always using the lighter colour first and using green darkest on top. I also used my blending tool to add a bit of black soothe distress ink around the feathers.
For the finishing touches I adhered my feathers again using the Nuevo adhesive pen used a black marker to make the lines that hold the feathers and the pretend chain holding the dream catchers. I also traced the stitched lines with my maker and stamped the sentiment from same stamp set using Jet black Archival ink. Added a few dark blue enamel dots to  finish off my journal page. Hope you enjoyed this tutorial, see you soon.

Friday 14 April 2017

Ducky Shaker Card

Hi this is Mona I am very happy  to be part of the Designer Team of Sunsational Crafts. This is a project I created for this new company.  I used the. new April release digital stamps called  Spring Ducky to create this fun Shaker card. Most of my colouring was done with  copic markers, I die cut two fancy scallop tag dies from Kat Scrappiness. I die cut a circle in the middle of the white tag then adhered a piece of acetate behind it. Then added foam tape behind the white tag and sprinkled  sequins also from Kat Scrappiness spring collection on the back of the acetate then glued the second tag behind it creating the shaker. Adhered the shaker onto my card base ,added the sentiment and also added a piece of twine thru the hole of the tag. This completes my card hope you enjoyed this quick tutorial.

Here is the link to her store for your browsing convenience. Sunsational Stamps


Thanks for stopping by , see you again soon!

Monday 10 April 2017

Cactus Card

Hi everyone, this is Mona back with a fun card idea using the pricks-really-suck-stamp-set-by-virginia-turtle that can be purchased at Kat Scrappiness.
I first started by cutting a piece of water colour paper 4"x4". I then stamped the cactus  on /inkadinkado-stamping-mask-paper-7x5-12-pkg to be able to mask as I stamp the cactus all around using my  ranger-archival-ink-pad-jet-black on my paper.
Once the image as been stamped all around I decided to cut around the cactus with a knife and my scissors. I then went on to colouring using my zig water colour markers and my  Tim Holtz water brush. Once image was all painted I noticed my paper rolled so decided to glue it on a piece of acetate.
I then cut my card base 4 1/4x8 1/2 scored it at 4 1/4 making it a square card.. I realized after I wanted black around so used a full sheet of black card stock and scored I'm half glued it to the inside of my card and used scissors to trim around leaving a small edge of black. Now for the fun part the sentiment. I used one of the sentiment from the stamp set using full-size-versamark-clear-embossing-ink-pad  on black card stock with white embossing powder to make it pop. I then cut the sentiment using my scissors and adhered them to my card using foam tape. That finishes off my card hope you enjoyed this mini tutorial. Hope to see you again soon!

Wednesday 5 April 2017

Feathered Bird


 I really enjoyed making this project for #ccbchallenge.


I started by stamping and altering Tim Holtz Hipster stamp to make him a full bird. Then painted him using the Gansi water paint. Adhered some feathers behind him.


I used my distress oxide inks to make my background, then used the lid of a canister to make my circle a bit rounder. 


I decided I needed a banner to sit my hipster bird on.
I used my Stampin Up punch to cut the smaller triangle from my banner using canvas corp and 7 gypsie paper and for the larger triangle I used a piece of canvas. I then added eyelets in both corners to be able to get a string across my banner.


Now for the finishing touches I added splatter of water on background and a few black splatters .
I adhered some foam tape behind the bird to make him a bit more dimensional. Used a stapler to put my banner in place and glued a quote from one of my Dylusions stamp sets.
Hope you enjoyed this mini tutorial. See you soon!