Pages

Saturday 19 August 2017

Stuck with me!


Hello everyone this is Mona back with a fun card featuring a new digital stamp set called Cactus stamp set .


 I started out by die cutting my background using the fancy scalloped die set from Kat Scrappiness I then printed out my cactus stamp , coloured it in and adhered it to the background. I then finished it off by adding the sentiment on the card.

I hope you enjoyed this mini tutorial, thanks for stopping by and here is the link to the store for your shopping convenience. 

Saturday 12 August 2017

Bee Strong

Hello everyone this is Mona back with a fun card featuring several of Kat Scrappiness dies and a lovely stamp set from Gerda Steiner.
I started by cutting my card base  4 1/4x 5 1/2, and picking the pattern paper from my stash. I then die cut the Gift Bag Die twice and proceeded by die cutting a square to make my Shaker card in the first bag using Stitched Square Dies. For my card base I used the largest die in the Stitched Rectangle Die set .
Now for the fun part, I stamped this cute stamp called Bee Strong by Gerda Steiner using my Jet Black from Lawn Fawn then used my alcohol markers to colour the image.
I took out my sequins called Bumble Bee Sequins mix that is a  perfect mix for this card and went ahead and  used two way foam tape to adhere both bags together then adhered everything else in place. This completes my card for today, hope you enjoyed it.
Thanks for stopping by and make sure to go to Kat Scrappiness store to browse all her new crafting goodies. Here is the link for your convenience.
https://www.katscrappiness.com/

Saturday 5 August 2017

Shopping Therapy

Hello everyone this is Mona back with a fun art journal page featuring Kat Scrappiness brand new Gift Card Holder die.
I started by die cutting three gift bags in different colours.
For the background I Mod Podged yellow tissue paper from my stash, then distressed the edges using Jet Black Ink from Lawn Fawn. I then pulled different dies from my stash to add elements for the shopping bags. Once I had all my elements picked out, I coloured them, and adhered everything into place using my Nuevo Deluxe Adhesive.  
I finished off my project by decorating my bags and adding a sentiment. Hope you enjoyed this mini tutorial. Thanks for stopping by, see you again soon. Don't forget to browse the Kat  Scrappiness store for all your crafting needs, https://www.katscrappiness.com/

Friday 4 August 2017

Flipper Paradise

Hello everyone this is Mona back with a fun art journal page featuring Kat Scrappiness brand new Stitched Dolphins die set and  the  Sign post die set . 
I  started with my three favourite colours TH Distress Oxide Broken ChinaFaded Jeans and Wilted Violets to make my background using my Dreamweaver Stencil Brush.
Once all three colours were to my satisfaction, I took a old paint brush dipped it in water, and added some splatters, and took my big brush markers to make a horizontal line to differentiate the ocean from the sky.
I added some Stamping at the bottom using my Jet Black Lawn Fawn Ink and a stamp set from my stash. Coloured in the seaweeds using some alcohol markers. I also die cut the 3 dolphins twice once in black to create the shadow and in white to be able to colour them in gray.
Here is where I die cut my sign post, coloured it a very light beige,  then added a wood grain stamp over it using a light brown ink to imitate the wood. I took my sharpie and wrote random things on my posts. I also added a moon. This concludes my mini tutorial for today.  Hope you enjoyed it.
Thanks for for stopping by and hope to see you again soon. Don't forget to stop by Kat Scrappiness store at https://www.katscrappiness.com/ for your shopping convenience.

Wednesday 2 August 2017

Camp More, Stress Less


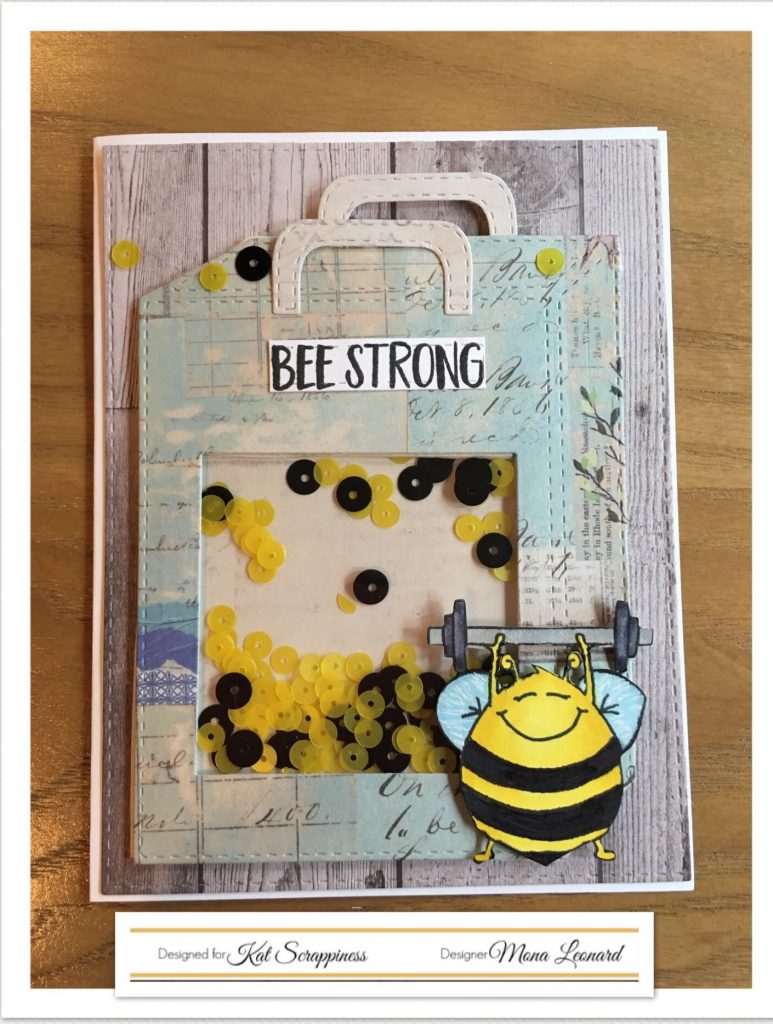
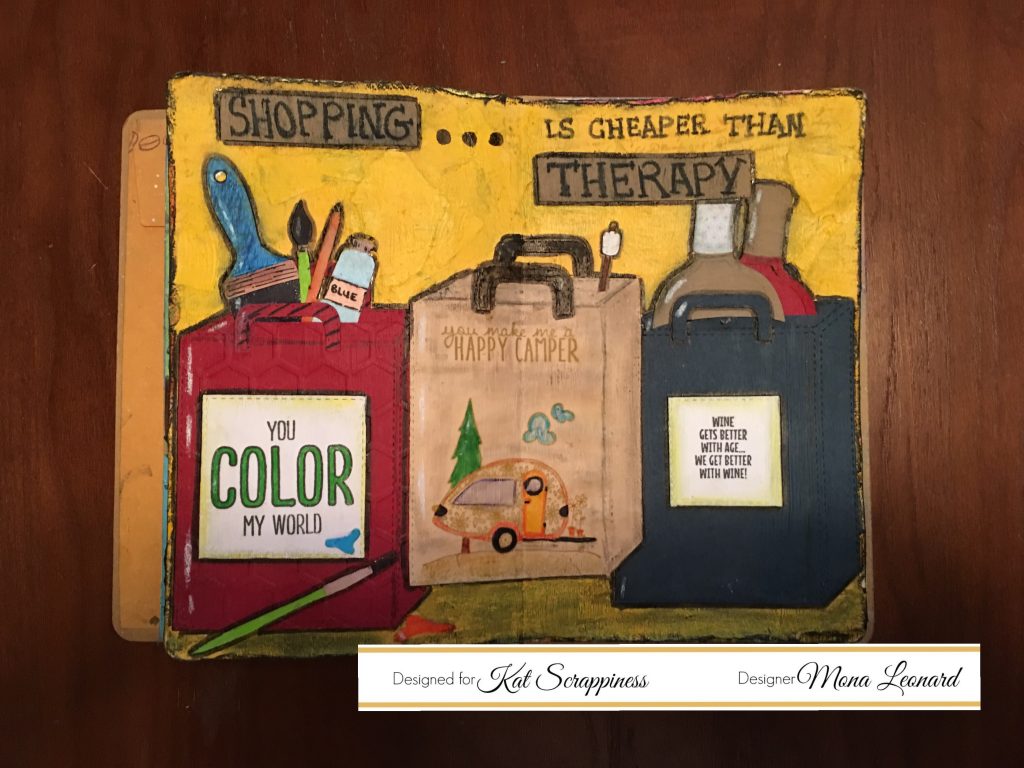
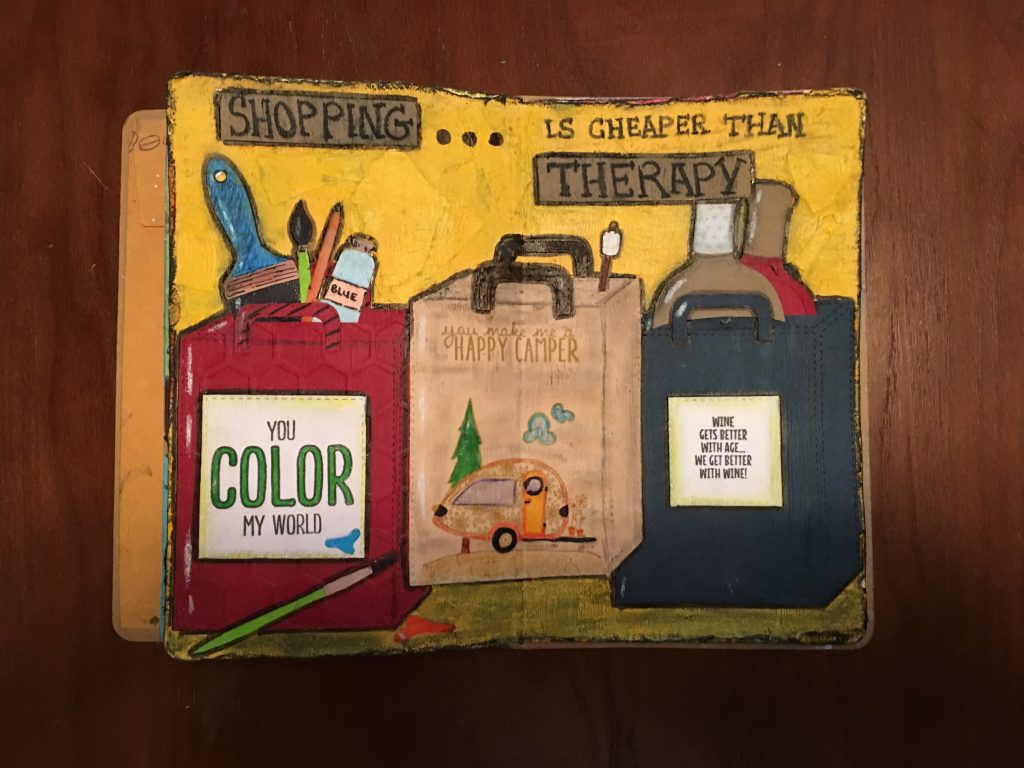
Hello everyone this is Mona back with a fun card featuring a stamp set from Sunsational Crafts called   


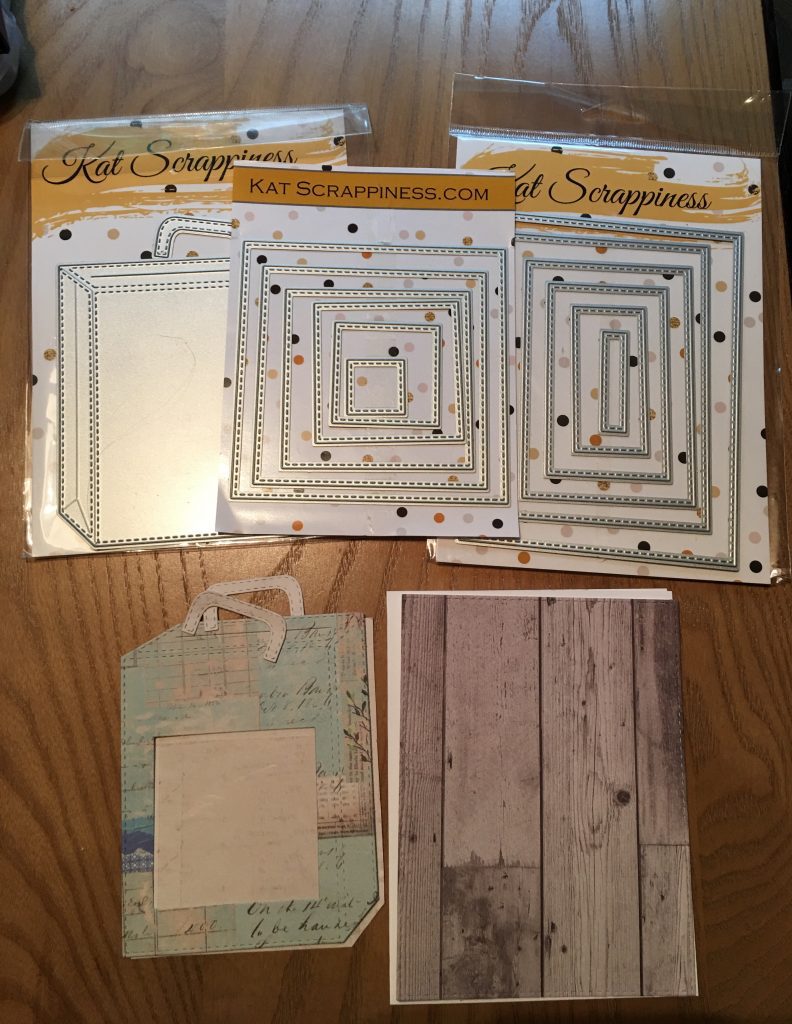
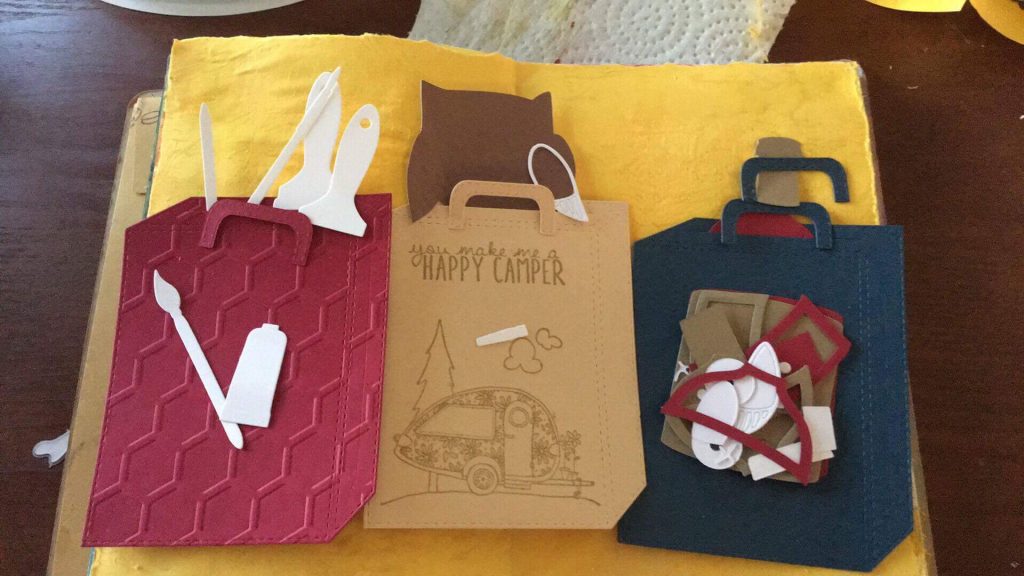
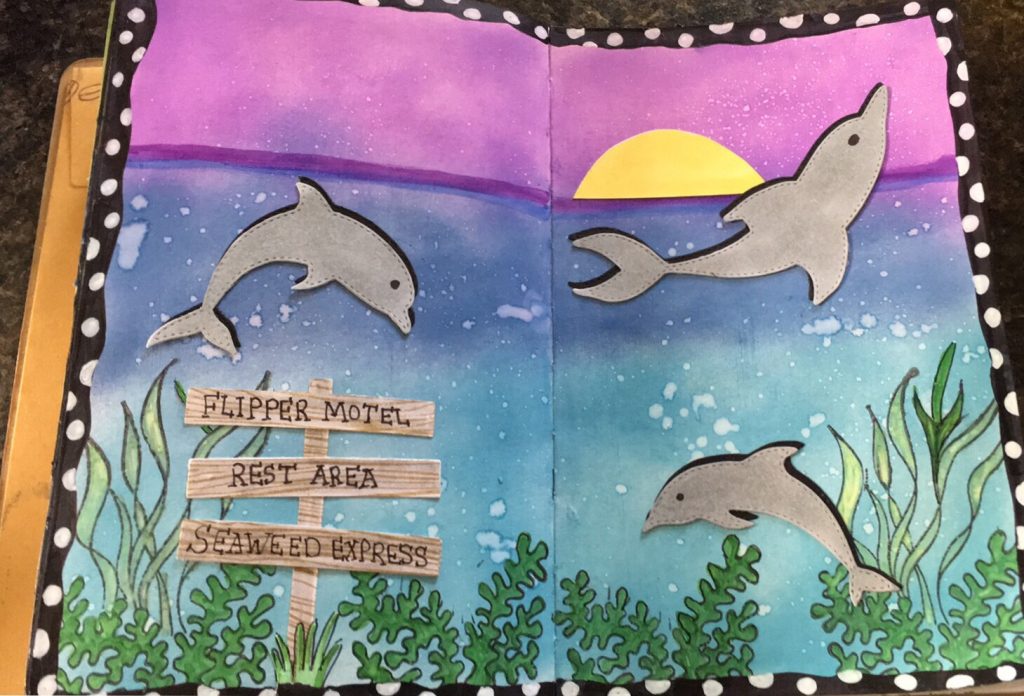
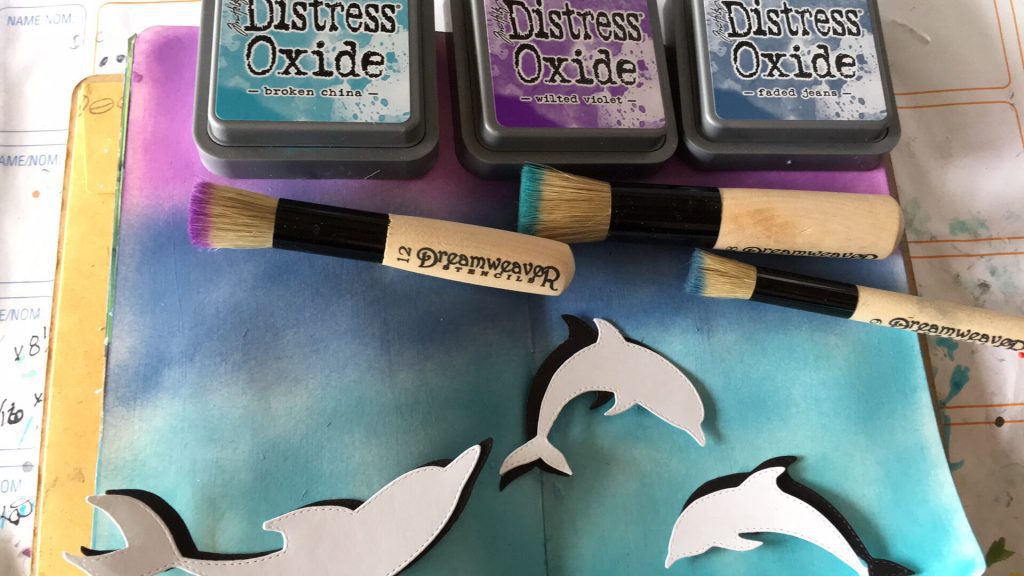
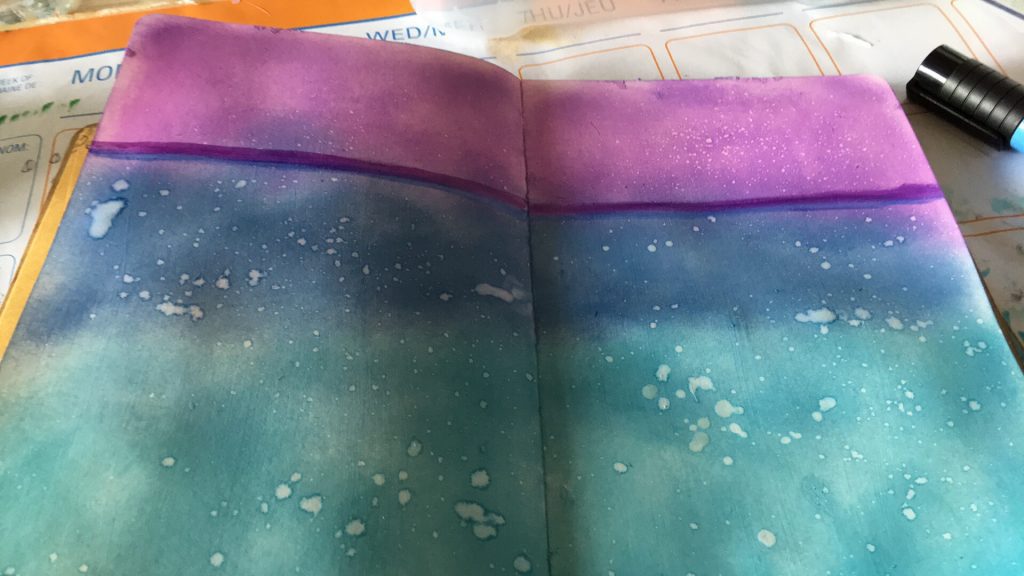
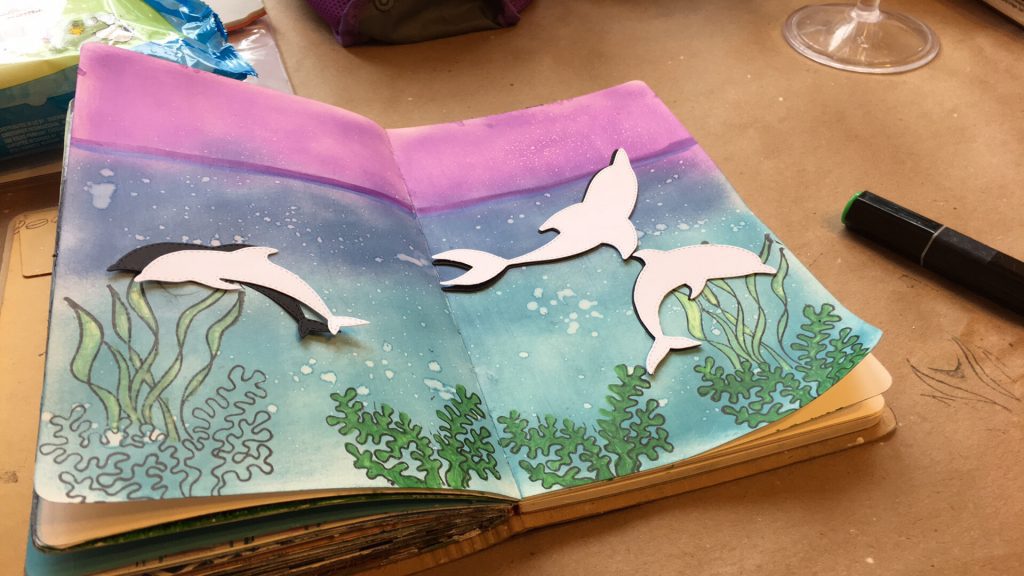
I first started by printing out the stamp set and colouring the trailer using my Spectrum Noir markers used some paper from my stash to create the background and die cut some clouds and grass.


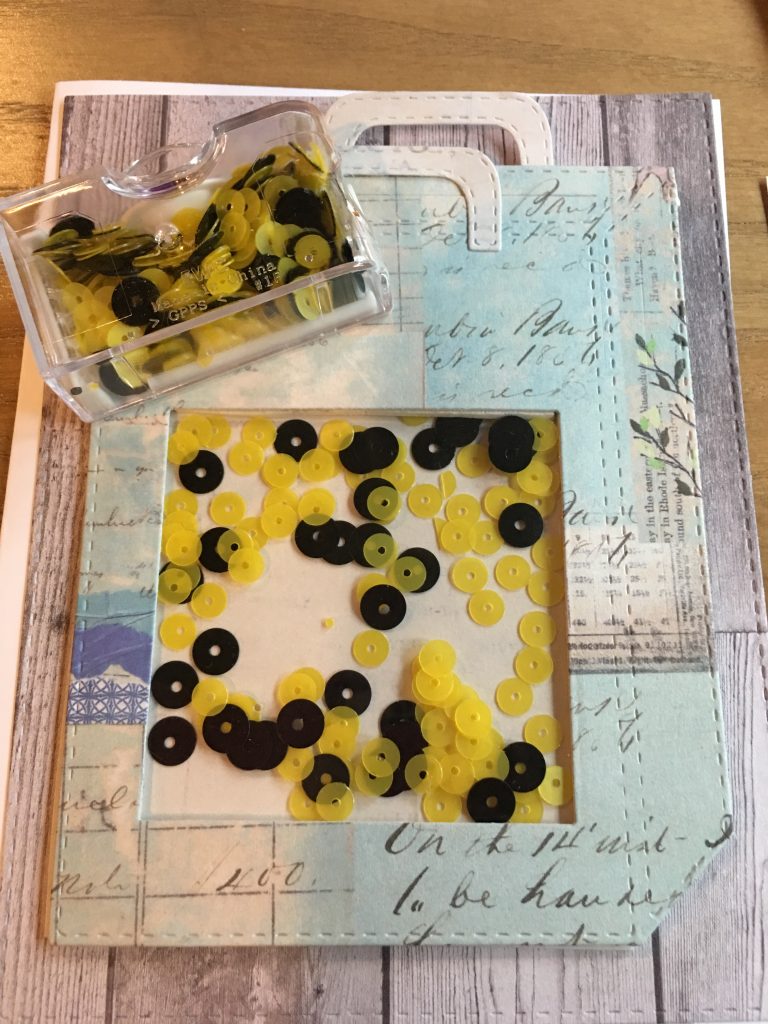
Once everything was coloured and cut out I used my Best Glue Ever to adhere everything down. It is my new to go to Glue now. It requires a very little amount and dries clear in case it oozes out. It Also dries fast with a very strong bond. This completes my project for today hope you enjoyed this mini tutorial.


Thanks for stopping by here is the link for ScraPerfect http://scraperfect.com/ To view their Glue and many other wonderful products. 
Here is also the link to Sunsational Crafts http://sunsationalstamps.com/shop/ for your viewing convenience.