Pages

Tuesday 28 November 2017

Define Naughty

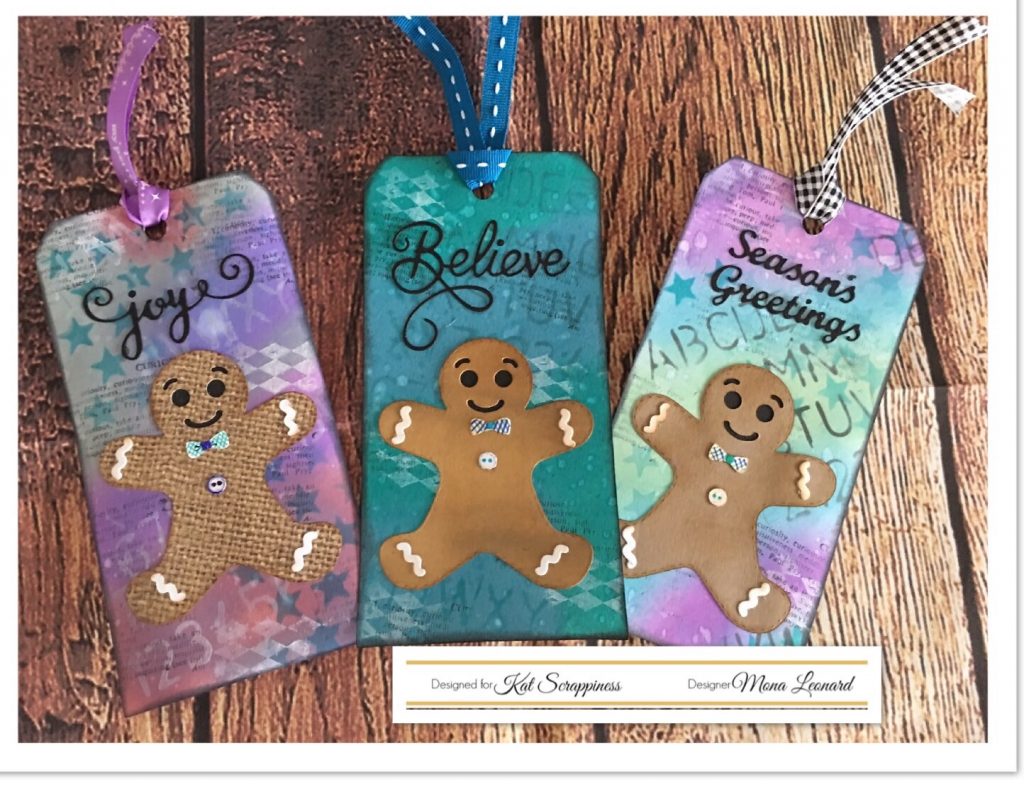
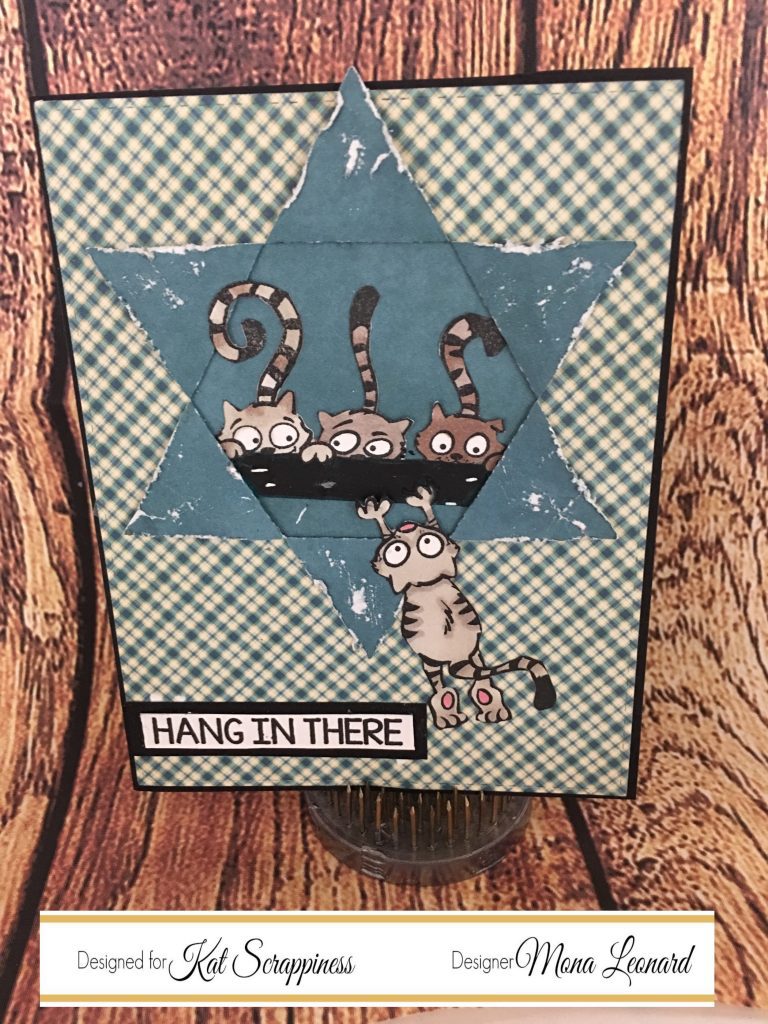
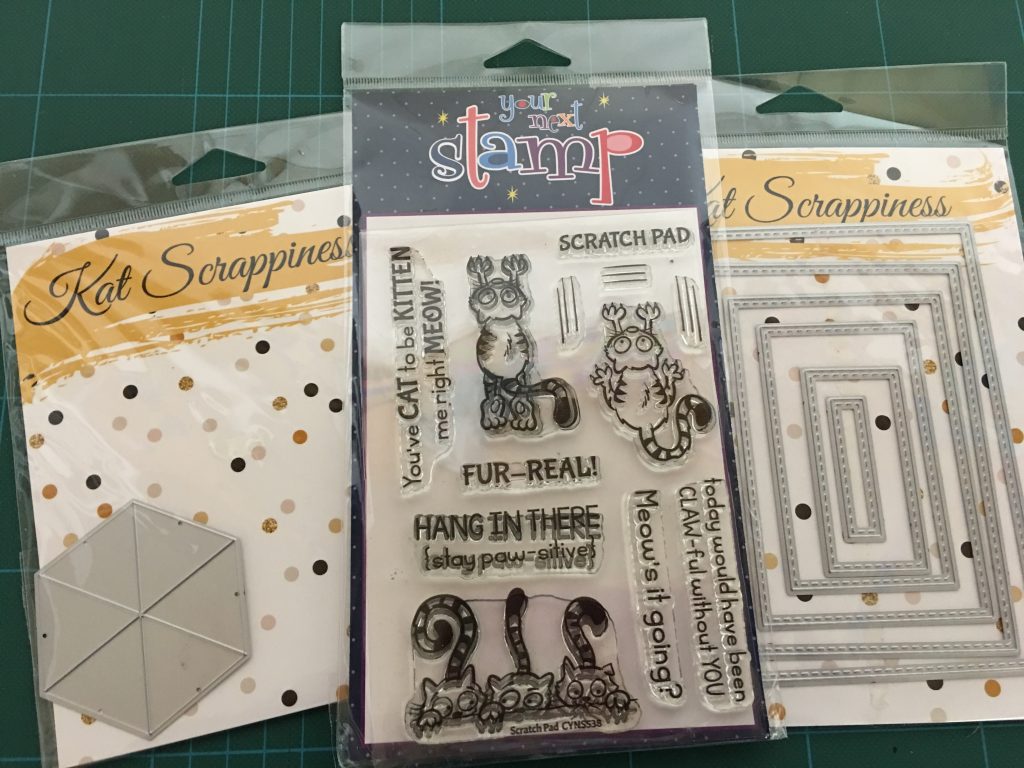
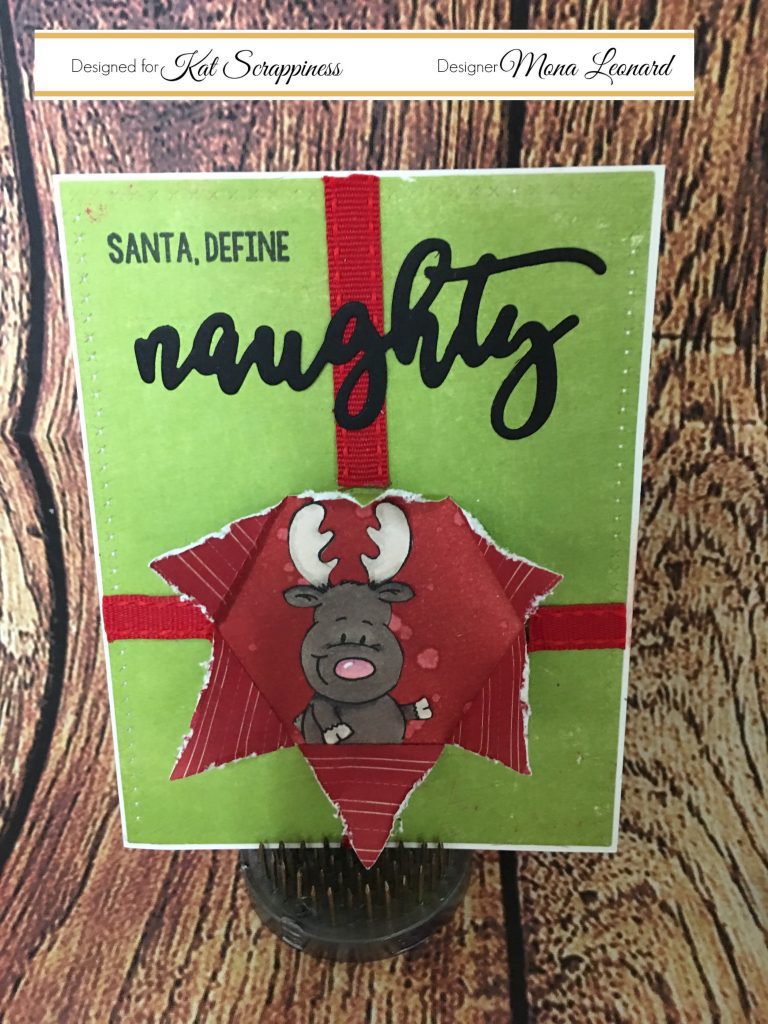
Hi, it's Mona back with a card featuring Kat Scrappiness Naughty Christmas Stamp set and matching Die   ,the Pop Out Die also from Kat Scrappiness and Peeking friends from Gerda Steiner.
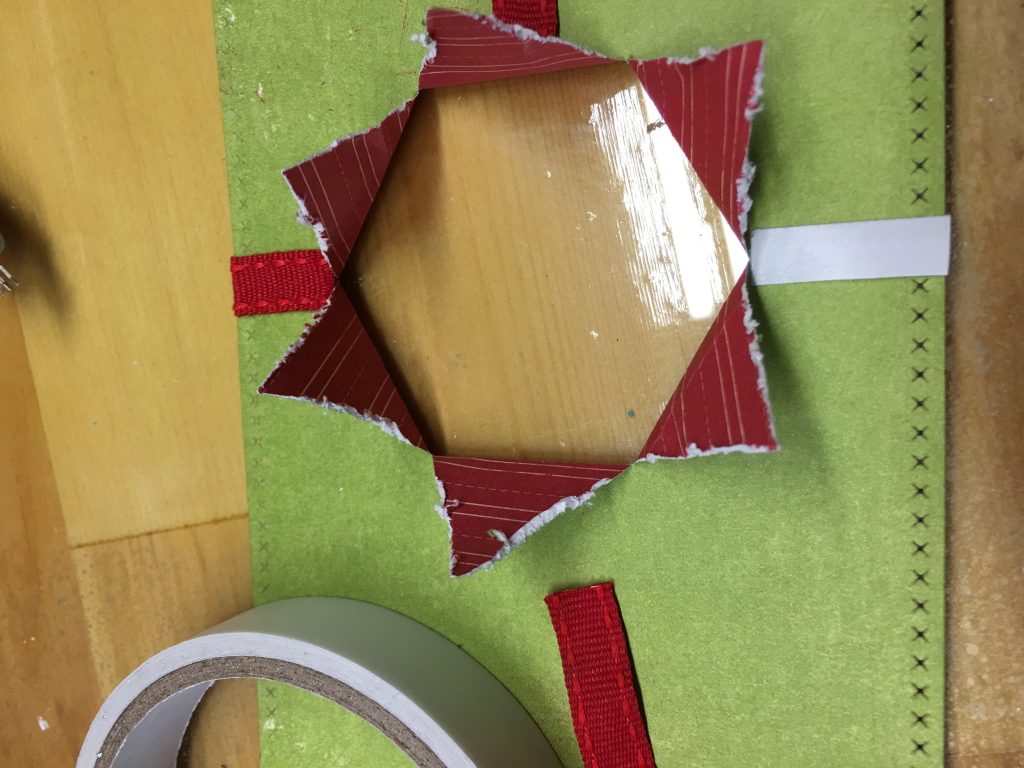
I started by picking a double sided patterned paper and die cutting it using the largest of  Kat Scrappiness Rectangle Cross Stitch Die  set  that fits perfectly on a A2 card base. I then took the pop out Die and die cut it more toward the bottom of the card and distressed the edges using Tim Holtz distress tool. I then added double sided tape and adhered the red ribbon on top.
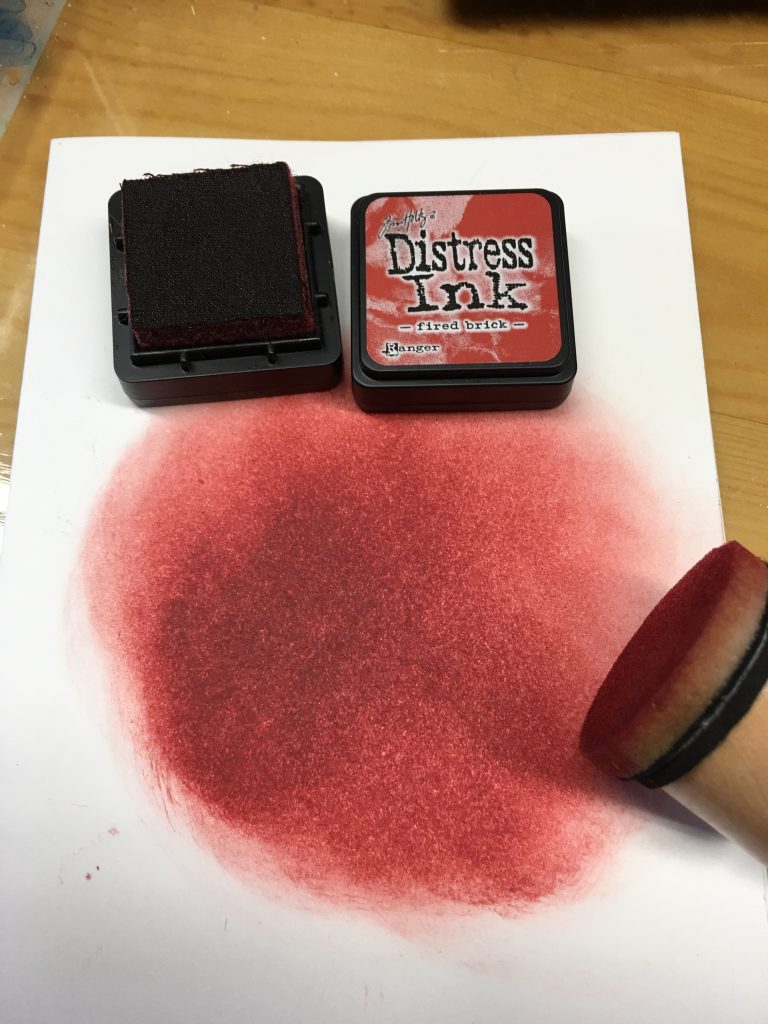
I used my Red Brick disrtress ink and my blending tool to cover the opening of my pop out on my card base. Using my paintbrush, I added droplets of water to add texture to the background.
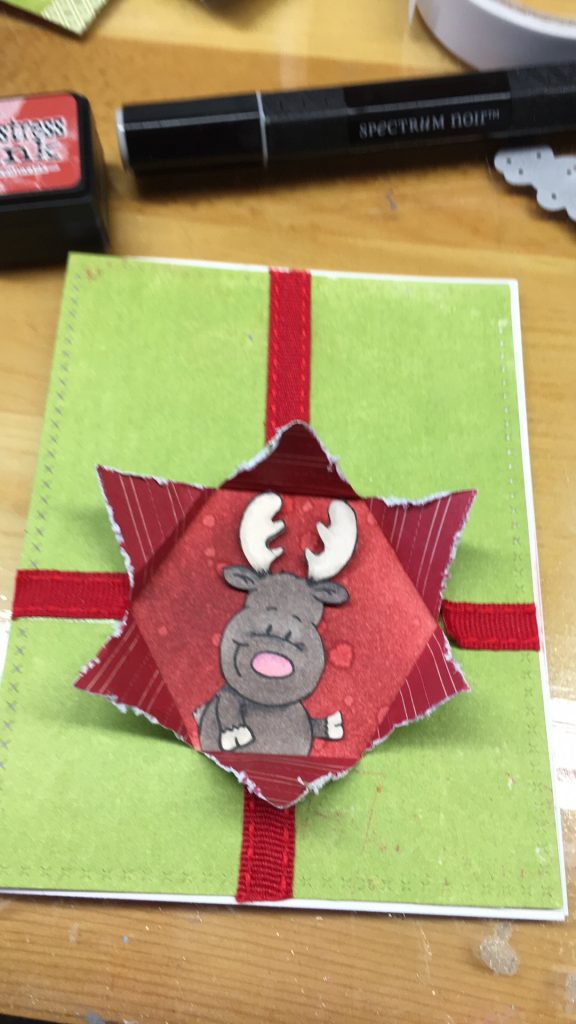
Now for the fun part I stamped and coloured in my little moose and adhered him peeking out of the hole.
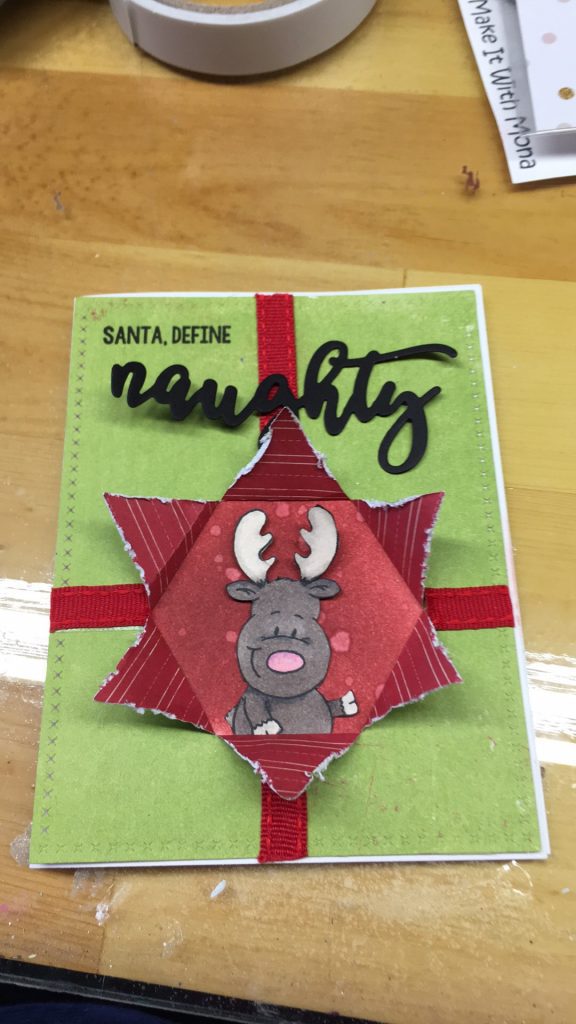
I die cut the word Naughty using black cardstock and used my lawn Fawn Jet black ink to stamp the sentiment above the Naughty. This completes my card for today.  I hope you enjoyed it!
For your browsing convenience please don't forget to visit Kat Scrappiness at the link above. Thanks for stopping by.

Sunday 19 November 2017

Gingerbread tags

Hi everyone this is Mona back this time featuring Kat Scrappiness brand new  Design a Gingerbread Man Die  and used many of Tim Holtz DISTRESS OXIDE inks Cracked Pistachio , Wilted Violets , Broken China ,Faded JeansFired BrickIced Spruce are the colours I used to make my backgrounds.
I first started out by die cutting 3 of the gingerbread men using 3 different cardstock s I had in my paper stash and 3 tags with a die cut I had in my stash.
This is where I played around with my distress oxide inks making different colour backgrounds. I then took a old paint brush dipped it in water and let water drops fall on the tags. I proceeded by using different stencils and same inks giving it even more texture and then a little bit of stamping using lawn Fawn Jet Blackand for the final touches on my tags I used the same black to distress the edges. The greetings were die cut ,every thing was glued into place and attached some ribbons from my stash.
I hope you enjoyed this mini tutorial. Thanks for stopping by, hope to see you again soon!
Here is the link to Kat Scrappiness for your shopping convenience.

Sunday 5 November 2017

Hang In There


Hi everyone this is Mona back with a fun card featuring two ok Kat Scrappiness brand new Die and a  stamp set from your next stamp.
I started by cutting my card base in this picture you see it in white 41/4 x 51/2 , but I later change my mind and change it to black. I proceeded by cutting my front panel with dole sided pattern paper with the Kat Scrappiness Rectangle Stitched Die the largest of the set. I then placed my Pop out Die where I wanted the whole and die cut it and covered the back of the hole with the same cardstock. Now to give it the torn look I decided to use my Tim Holtz distressing tool around the  picks of the hole.
Now for the fun part stamping , colouring and fussy cutting all my cats and my sentiment.
Here I placed everything where I wanted it. But as you will see in my final picture I decided to cut sentiment in half,, leaving Hang in there on the front and stay pawsitive in the inside of the card. This completes my card for today.
Thanks for stopping by, hope to see you again soon. For your shopping convenience here is the link to Kat Scrappiness Store  https://www.katscrappiness.com/


Saturday 4 November 2017

Eat Drink & Be Scary

Hi everyone this is Mona back with a cute journal page featuring Kat Scrappiness brand new stamp and die called Toils &Trouble Layered stamp set.
I started out by putting a thin layer of gesso all over my page . Oh! By the way this is in my Dylusion Creative Journal . Once my gesso was dry I used a brick stencil from my stash and my Dream weaver Stencil brush to add Tim Holtz Iced Spruced Distress Oxide to imitate the bricks.
Once my bricks were dry, I used the same stencil brush and a wood grain stencil this time using Tim Holtz Vintage Photo Distress Oxide to make the floor.
While all my background is drying I used the toils and trouble stamp set and my Tim Holtz Stamp platform to stamp 3 cats in 3 shades of grey then I used the matching Die to cut them out.
Here I did the same thing using the skull stamp one in 3 shades of brown and the other using 3 shades of green. I also Die cut those using the matching die.
Sorry for my messy desk ☺️. This is where I drew 3 light bulbs using a pencil and when I was satisfied I used a black sharpie to trace them. I also used a yellow marker to colour the bulb and a grey for the metal part of it. I then glued everything in place using Ranger Multi Medium. Once everything was glued in place I added the twine for the suspended shelf and also for the light bulbs. For the finishing touch, I used my Faber Castell big brush markers to do all the shading and a white gel pen for the highlights.
This concludes my mini tutorial,I hope you enjoyed it. Thanks a lot for stopping by,hope to see you again very soon.